


You can register for classes during the registration period for a term. Your registration period begins with your assigned registration date and time. Once your period begins, use the steps below to add classes to your schedule.
- Log in to MyDelta
- From your MyDelta homepage, click the Manage Classes icon.
- Click on Class Search and Enroll from the left sidebar menu.
- Click the term that you are registering for.
- Use the class search to look for the course you wish to enroll in.
- Need help using the class search? Read our Class Search Tips
- From your search results, click on a course you wish to know more about.
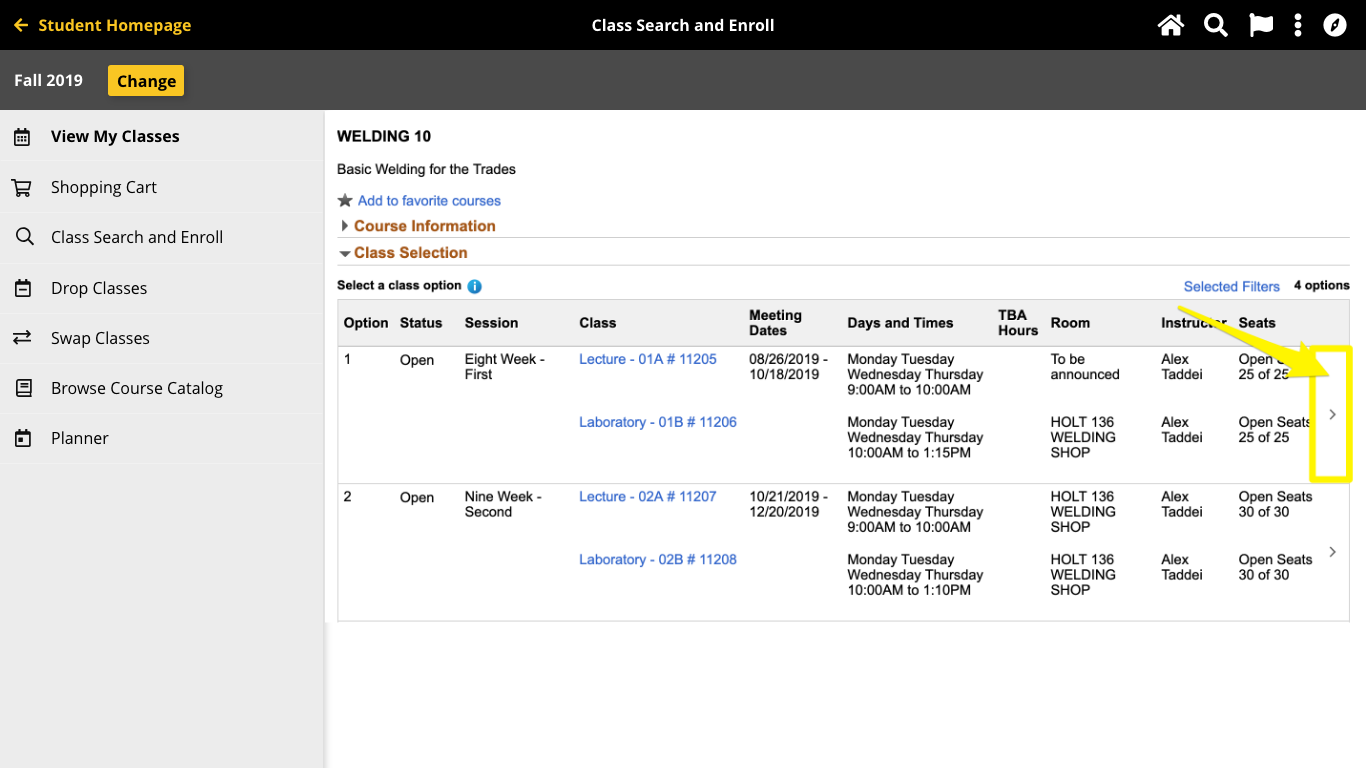
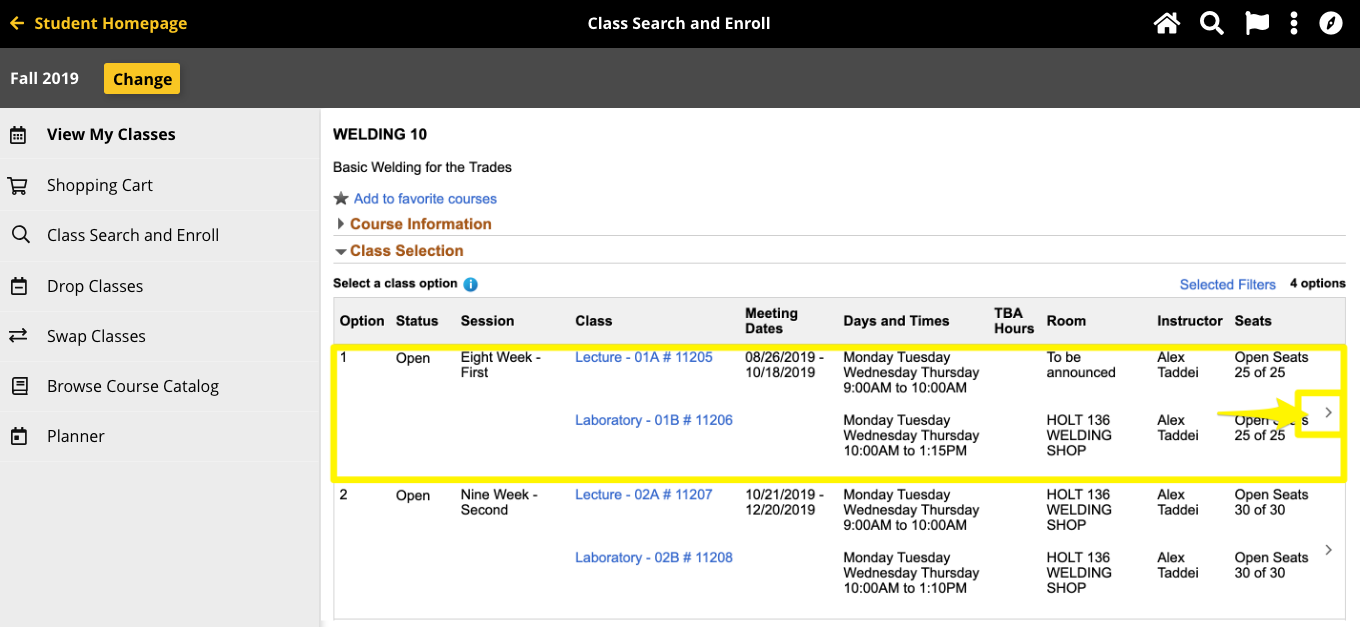
- Information about the course will be displayed in two areas, Course Information and Class Selection
- Course Information displays the course description and basic course details
- Class Selection shows all of the classes available for the course during that term. If the course consists of multiple components such as lectures and labs, all available combinations of the components will be presented. You can learn more about the class by clicking on the link in the Class column.
- If you are ready to add the class, look for the arrow pointing right on the far right of the row of the class. If there is no arrow, enrollment for the term may not be open or you may be ineligible to add the course. If there is an arrow, click anywhere on the row of that class to start the process of registering for the class.
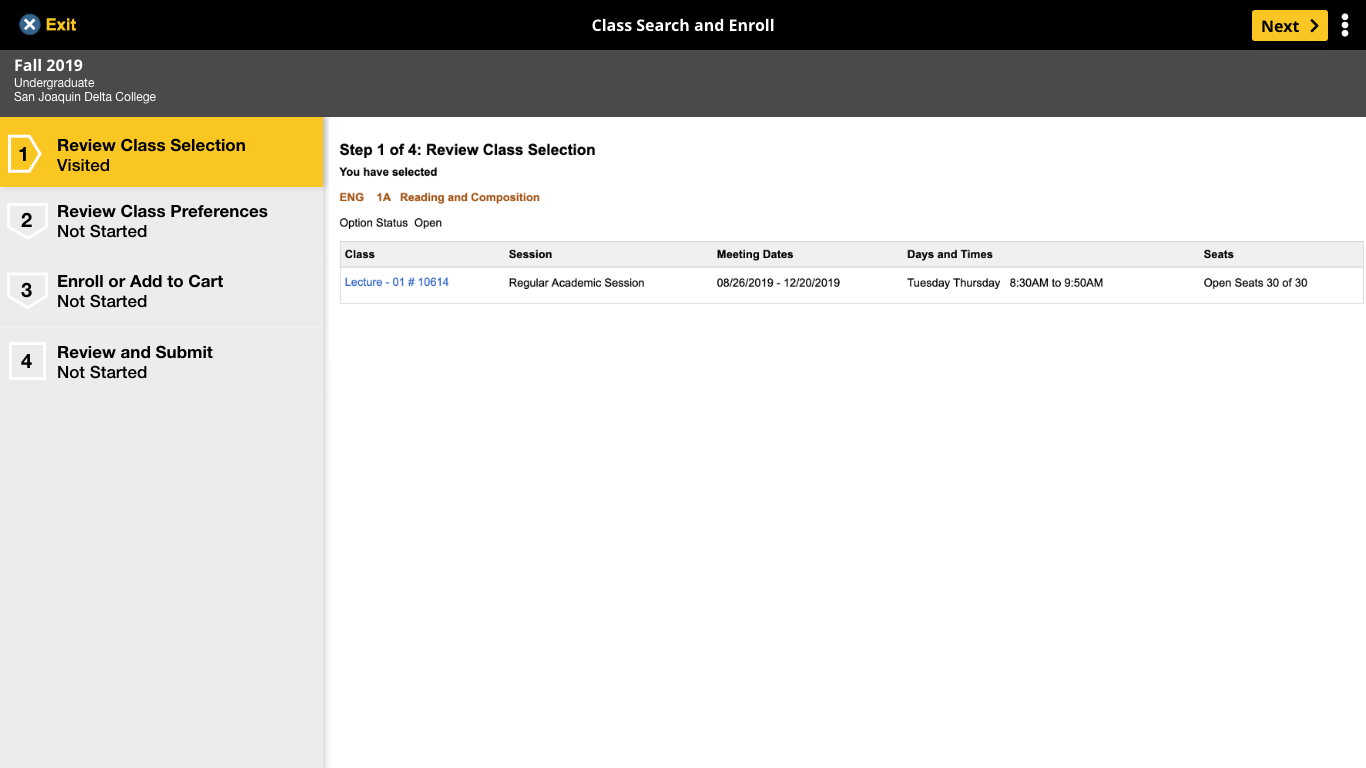
- After selecting the course, the Review Class Selection step appears. Review the class to confirm this is the class in which you would like to enroll or add to the shopping cart. Once confirmed, click Next.
- Next, Review Class Preferences. If the course is full, here’s where you can request to be added to the waitlist. Choose Yes or No, and then click Accept to continue.
- The Enroll or Add to Cart page appears. Select whether you wish to register in the class or Add to Shopping Cart. If your enrollment appointment date has not arrived for the term, you will only be able to select Add to Shopping Cart.
- The Review and Submit page appears. Click on any of the previous steps on the left to review and change options if needed. If the class displayed is correct and all preferences are set correctly, click Submit.
- Click Yes to confirm the submission of the class choice and enroll in the class.
A confirmation page will appear and let you know you the class has been added to your schedule. You can continue to repeat this process, adding all the classes you plan to take in the upcoming term to your schedule.