


Grade Roster
The Grade Roster is used to record a final grade for each student who is formally enrolled in a class the day after the final drop date. A grade must be assigned to every student listed on the Grade Roster before posting the grades to Admissions and Records.
The Grade Roster will be available towards the end of a session or term, once student rosters are final (i.e. all student adds, drops, withdrawals are reflected and final) and it's time to enter grades.
Video Tutorial: How to Use the Grade Roster
Accessing the Grade Roster
- Login to MyDelta and click on the Faculty Center icon.
- A new page will load with your Teaching Schedule. (Note: defaults to the last semester viewed. In order to look at your schedule of a different term, click the Change Term button to select a term from a list of all terms).
- If the class you are teaching has a grade roster available, the Grade Roster icon will appear to its left in the schedule.
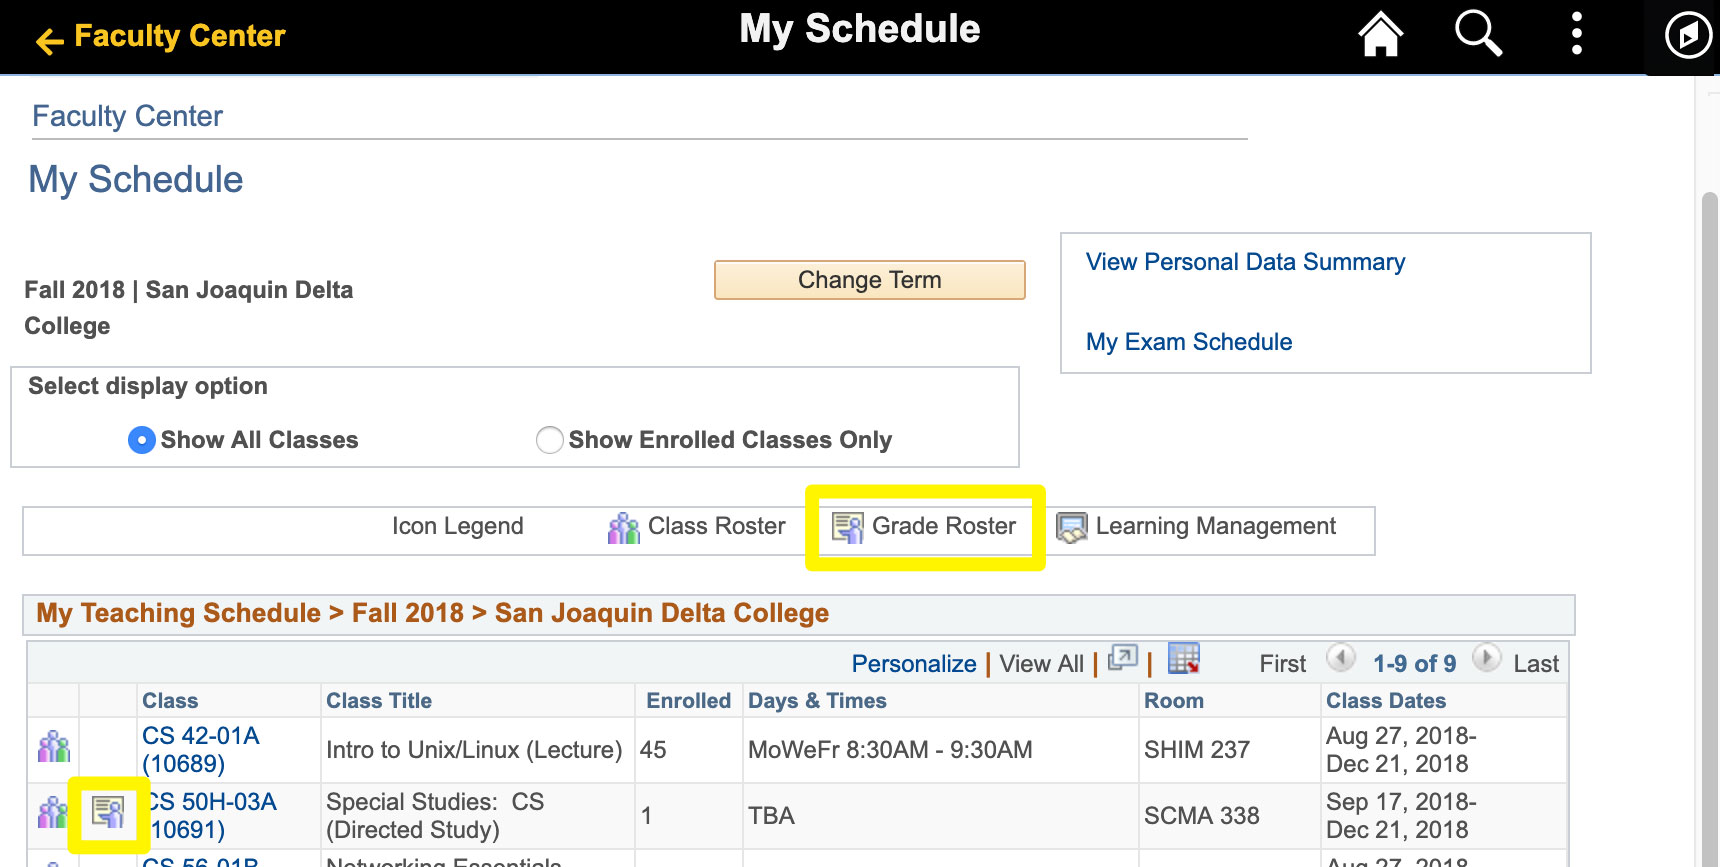
- Click on the Grade Roster icon and the Grade Roster screen will appear. At the top of the screen is the class meeting information.
How to Enter Grades
Once on the Grade Roster, using the following steps to help you enter your final grades.
- On the roster, you will see the Approval Status dropdown list. The following statuses are available:
- Not Reviewed — This is the initial status and indicates that no one has reviewed any grades. Grades can only be entered when the status is set to Not Reviewed.
- Ready for Review — Grades have been entered and are ready for review before submitting them. This can be used as a workflow between the teaching assistant and a primary instructor to indicate the grades have been entered. If such workflow does not exist, Ready for Review can be skipped.
- Approved — When the status is changed to Approved, the roster locks grades from being entered and grades are ready to be posted to a student’s record.
- To start entering grades, make sure the status is set to Not Reviewed.
- To assign a grade to a student, click on the dropdown field in the Roster Grade column.
- A dropdown list appears containing only those grades applicable to the student's grading basis. Select the appropriate grade.
- You can apply the same grade to multiple students at once by checking the box next to each student and clicking the Add This Grade To Selected Students button
- Please be aware that some students may already have "W" grade assigned or may have elected a special grading basis, like audit grades. A ‘W’ grade should not be changed.
- Click Save at any time to save work in progress. If needed, it is acceptable to log out of MyDelta and return at a later time to finish entering grades.
- When finished entering grades, click on the Approval Status dropdown list, if available, and select Ready for Review. Click Save to save the grades and status. (Note: This step is optional and is available should you have multiple users managing the grade roster. You may also skip directly to Approval Status (Step 7).
- Once all grades are reviewed, click on the Approval Status dropdown list and select Approved and click Save.
- After grades are approved, click the Post button at the bottom of the roster when you are ready to post grades and make them available to students to view.
- Note that once “Posted” grades will be official and the Grade Roster will no longer be able to be edited. To change a grade after it’s posted, please follow the steps to a Request a Grade Change.
Grade Change
Use the following steps to change a grade after they have been posted.
From the Grade Roster:
- Click the Request Grade Change button.
- A Grade Change Request page will load with all the students enrolled in the class and their official grade.
- From the official grade dropdown, select the appropriate new grade.
- Provide a Last Date of Attendance if Required.
- Select the appropriate Reason from the Change Reason dropdown.
- To submit the request for a grade change, click the Submit button. A Success message will appear in the row of the student of the grade you changed.
- Click Return to Grade Roster to return to the Grade Roster and view the student’s upgraded Official Grade.
To learn more about the College’s Census Policy, please review the Manual of Student Attendance and Reporting.